Welcome to a comprehensive guide for the Dread Cellar dungeon in The Elder Scrolls Online. This dungeon was introduced with the Waking Flame DLC during Update 32. It’s available in both Normal and Veteran difficulties, with optional Hardmode challenges for each of the three main bosses as well as the secret bosses hidden throughout the instance. You can enter this dungeon through the Group & Activity Finder or by navigating directly to its location on the northern edge of the Blackwood zone.
The Dread Cellar is a grim relic of the Empire’s darker past—a place of secrecy and torment, hidden deep within the wilds of Black Marsh. Designed as a prison for enemies that needed to be forgotten, the dungeon holds ancient horrors and recent threats alike. This guide will walk you through every aspect of the dungeon, including boss mechanics, lootable sets, titles, achievements, rewards, and more.
Dungeon Sets and Rewards
There are four distinct item sets you can obtain in the Dread Cellar. Each represents a different armor weight category, along with a monster set.
- Crimson Oath’s Rive – A heavy armor set that enhances group-based debuffs and damage capabilities.
- Rush of Agony – A medium armor set that focuses on movement and enemy control.
- Scorion’s Feast – A light armor set that supports sustain and group healing when engaging in aggressive combat.
- Magma Incarnate – The unique monster set from the final boss, offering strong group utility and support capabilities.
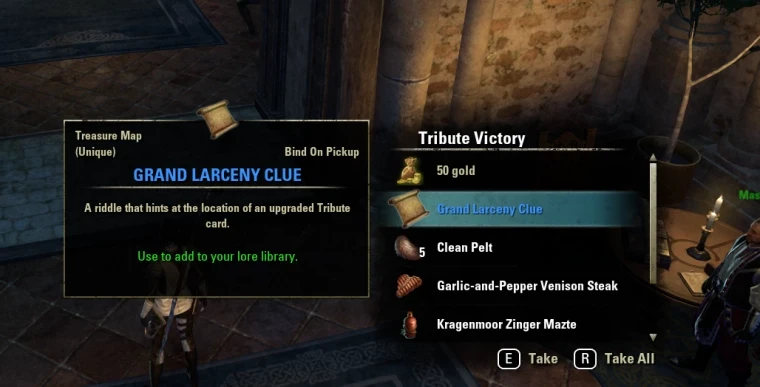
In addition to the sets, the dungeon also offers collectible rewards. Completing certain achievements can unlock cosmetics such as body and face tattoos from the Shattered Chivalry collection. These are earned by defeating specific bosses on Veteran difficulty. A notable title, “The Dreaded”, can be obtained for completing the dungeon’s hardest challenges, and defeating the final boss on Hardmode will earn you the “Incarnate” title.
Further rewards include the Agonymium Stone memento, unlocked through the Dread Cellar Conqueror achievement, and the Moonshadow Orchid dye for completing the Waking Flame Delver achievement. Collectors can also earn the Scorion Pyreling, a non-combat pet, through Waking Flame exploration achievements.
Trash Monsters and Their Roles
Throughout the Dread Cellar, you’ll encounter various trash enemies that provide challenges between boss fights. While many can be dispatched quickly with area damage, some require more attention.
- Basic Enemies: Waking Flame Pyromancers, Crimson Oath cultists, Scamps, Hungers, Clannfears, and Boltwyrms. These can typically be grouped up and eliminated with AoE attacks. Be careful to keep them contained, as they can overwhelm if ignored.
- Stronger Foes: Enemies like Armored Daedroths, Flame Colossi, Scorching Ogrims, Scorion Collectors, and Xivilai variants should be managed by the tank and positioned away from the group. Their attacks hit hard and can quickly disrupt a party if left unchecked.
Boss Health and Add Information
The Dread Cellar features three main bosses and three secret bosses. Below is an overview of their health pools on Normal and Veteran Hardmode, along with the types of adds they summon:
Main Bosses
- Scorion Broodlord: 2.5M / 8.5M HP | Summons a variety of adds regularly.
- Cyronin Artellian: 2.8M / 9.3M HP | Uses Storm Atronachs and Boltwyrms.
- Magma Incarnate: 4.1M / 15.5M HP | Supported by Scorion Collectors, Scamps, and undead enemies.
Secret Bosses
- Purgator: 3.7M HP | Calls Flame Atronachs.
- Undertaker: 3.8M HP | Summons Skeletal Archers.
- Grim Warden: 4.2M HP | Supported by Air Atronachs and uses whirlwind attacks.
Boss Encounters and Mechanics
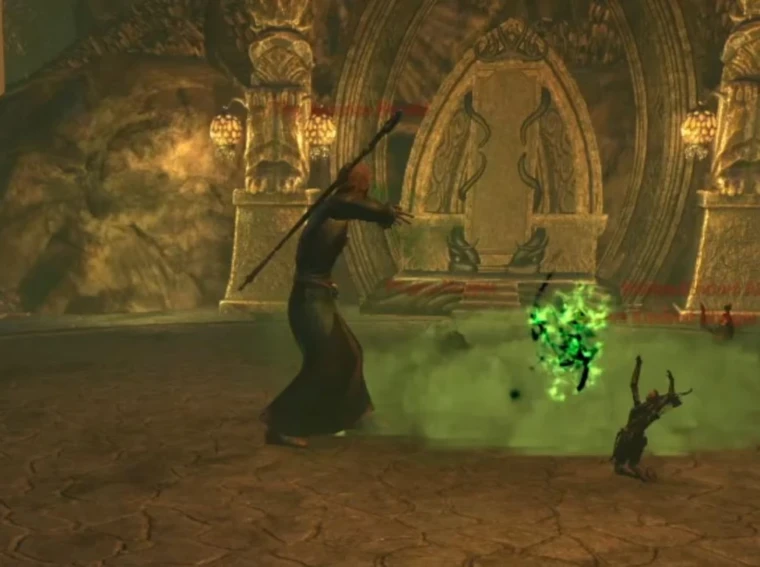
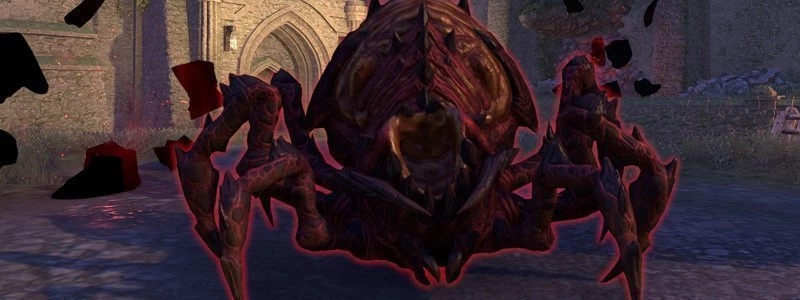
Scorion Broodlord
This is the first boss encounter and appears as a grotesque spider-like creature. The fight becomes more difficult on Hardmode, primarily due to the frequency and strength of the adds.
- Add Waves: Constant spawning of enemies which should be grouped near the boss and the Agonymium Stones for effective AoE.
- Agonymium Stones: Must be destroyed quickly to prevent healing effects on the boss.
- Ghost Skull Projectiles: High-damage magic attacks that should be avoided or healed through.
- Excruciating Expectoration: Applies a painful DoT effect that cannot be cleansed.
- Cone Attack (Turmoil): A wide frontal attack—tank must face the boss away from the group.
- Crush: Heavy attack that can one-shot players if not blocked.
- Pull & Explode: A proximity mechanic that draws players in and causes significant AoE damage if not evaded.
Hardmode emphasizes aggressive add waves and boosts damage output. Xivilai and Bone Atronach adds require immediate interrupts and control due to their AoEs and debuffs.
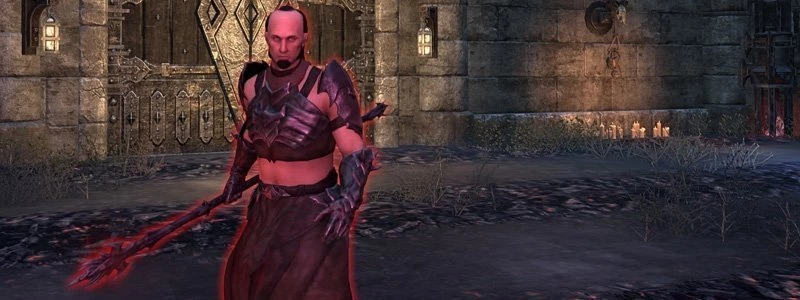
Cyronin Artellian
This mage-based second boss relies heavily on electricity and magic.
- Storm Atronachs: They use powerful AoEs and should be dealt with swiftly.
- Boltwyrm: Slows players and applies damage—optimal to face it when attacking.
- Heavy Staff Strike: Block or dodge to avoid serious damage; leaves shock fields behind.
- Soulstorm: Must be dodge-rolled as it cannot be blocked.
- Dread Surge: Moving waves of energy that require constant repositioning or evasion.
Hardmode introduces a lightning orb mechanic. A debuff placed on two players will drop AoEs under them that must be avoided quickly to prevent group damage.
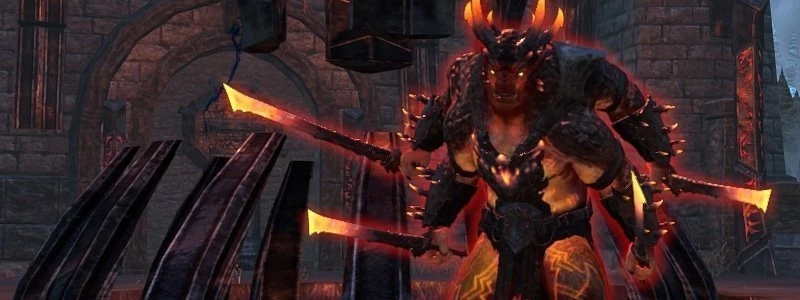
Magma Incarnate
The final boss of the dungeon brings overwhelming fire-based damage and layered mechanics.
- Unstable Blitz: A chain-damage ability that escalates quickly if not mitigated.
- Dancing Flames: Mobile tornadoes that deal massive fire damage on contact.
- Catastrophe: A high-damage AoE that must be dodged or healed through.
- Path of Fire: Fires a damaging trail toward players; can be blocked or dodged.
- Frenzy: Heavy attack—should always be blocked.
- Portal Phase: At set intervals, the boss becomes invulnerable, and an Agonymium Stone must be destroyed to prevent a scorion from gaining power.
- Tornado Wall: Appears near the end of the fight and can wipe the group if not avoided.
On Hardmode, additional AoEs and scorions spawn at 60% and 30% health. Path of Fire also leaves flame pools, significantly increasing the pressure on the group.
Secret Bosses and Buffs
Unlocking secret bosses requires players to locate Daedric Flames and use them to light braziers near mysterious corridors. Once activated, a ghostly guide will lead you to the miniboss arenas.
Purgator
This fire-themed enemy summons Flame Atronachs and uses meteor attacks.
- Buff: Increases Weapon and Spell Damage by 300. Activating the Guardian Stone summons Purgator for one minute and revives allies. Attacks apply Searing Sting and stack Heating Up.
Undertaker
This lich summons Skeletal Archers and uses powerful magical bolt attacks.
- Buff: Increases Magicka and Stamina Recovery by 200. Guardian Stone summons Undertaker and revives allies. Attacks apply Siphon Essence based on max health.
Grim Warden
An aerial-themed boss who uses deadly spinning attacks and summons Air Atronachs.
- Buff: Increases Max Health by 2000. Guardian Stone summons Grim Warden and revives allies. Attacks generate ultimate and apply Warding Aria, reducing damage taken.